Stop motion animation is a technique that involves taking a series of still photo and then playing them back in sequence to create the illusion of movement. It is a fun and creative way to bring your ideas to life, and it is surprisingly easy to do with Photoshop.
In this tutorial, we will show you how to create a simple fake stop motion animation in Photoshop. We will cover everything from setting up your scene to taking your photos to editing your animation.
Scene Design
Step 1
The first stage is scene design. In this project, I have a photo of the desktop that I want to be the background of my project. I also have a picture without a background of a cup of coffee that I want to move around the scene as my subject.
A very important point!
In order for your stop motion to look more realistic, you should note that the color and light of your subject and background should be match. I do this with the help of Hue/Saturation adjustment and Curves adjustment layers in Photoshop.
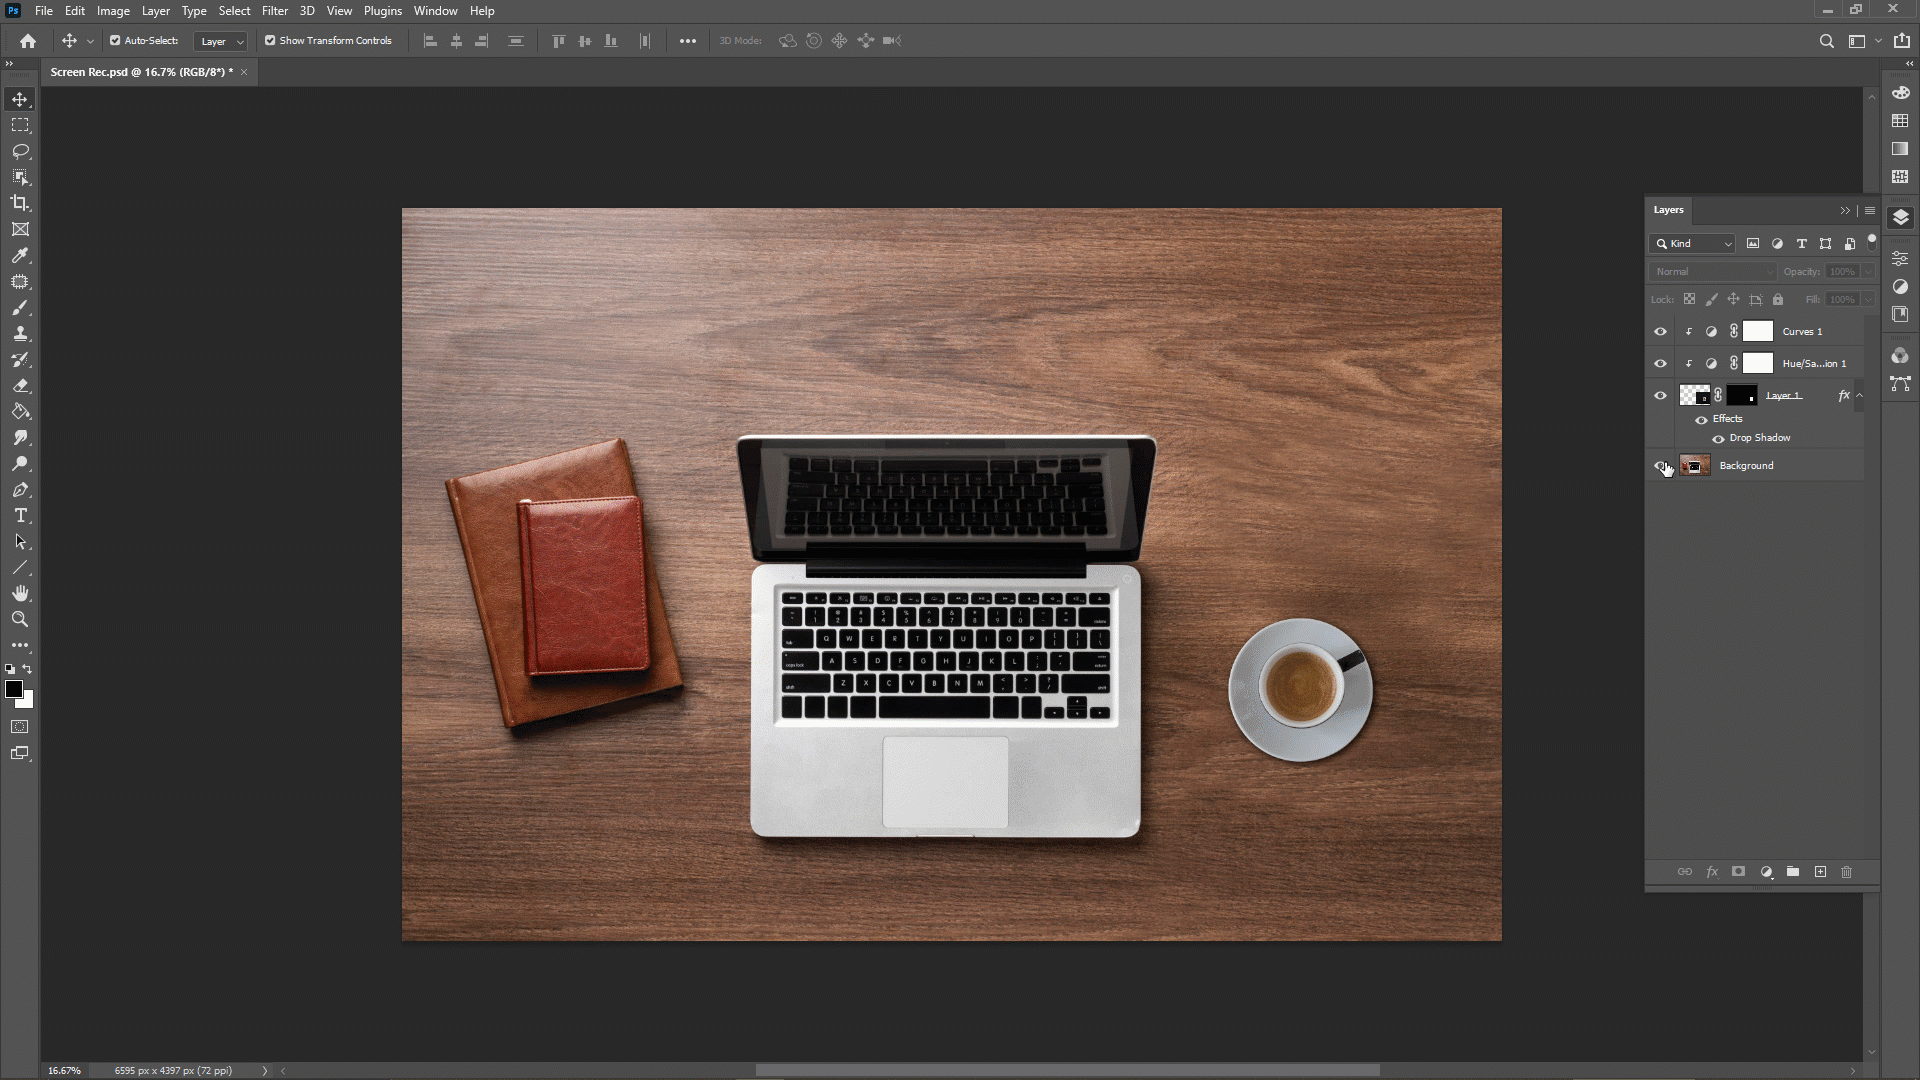
After adjust the color and light, you should convert adjustment layers and subject layer to the Smart Object.
Also, note that the direction and amount of the shadows of the subject and the background components must be match. You can create and manage the shadow of your subject by Drop Shadow effects in layer style.
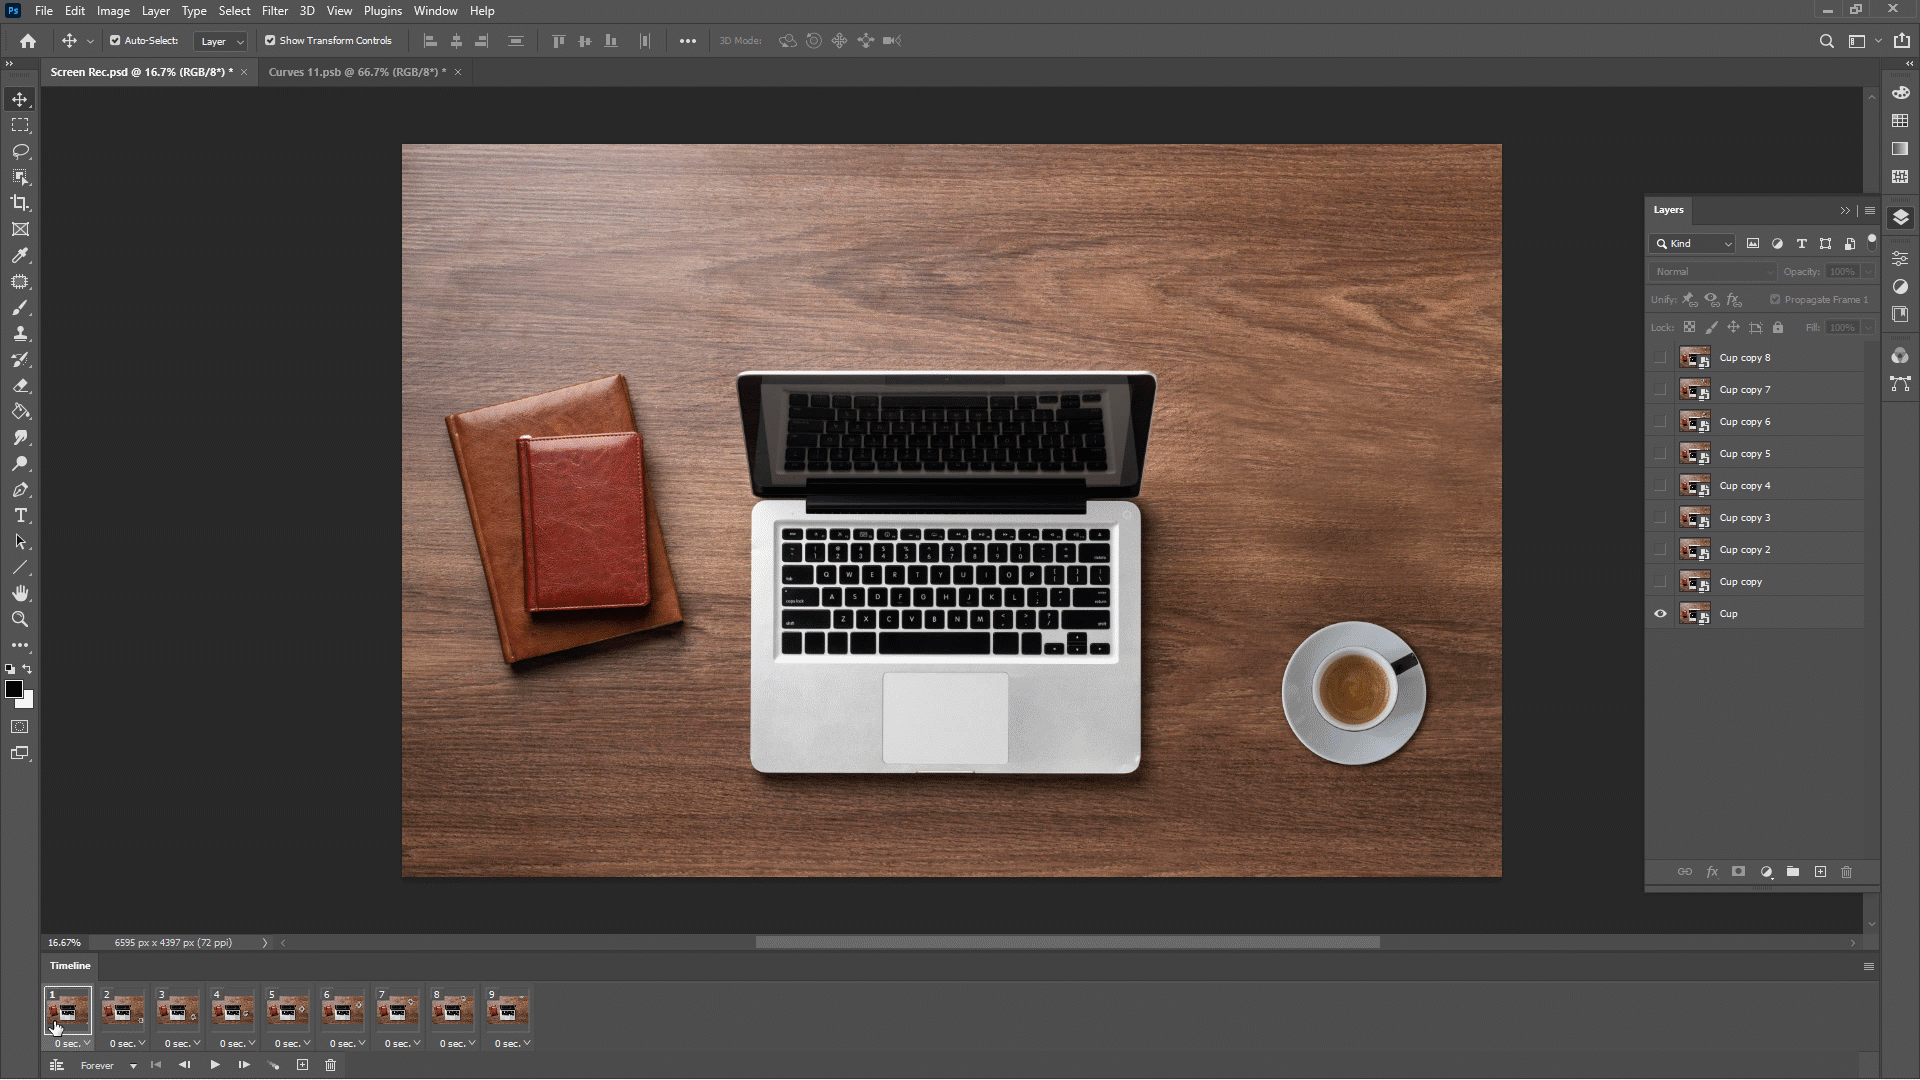
Create Frames
Step 2
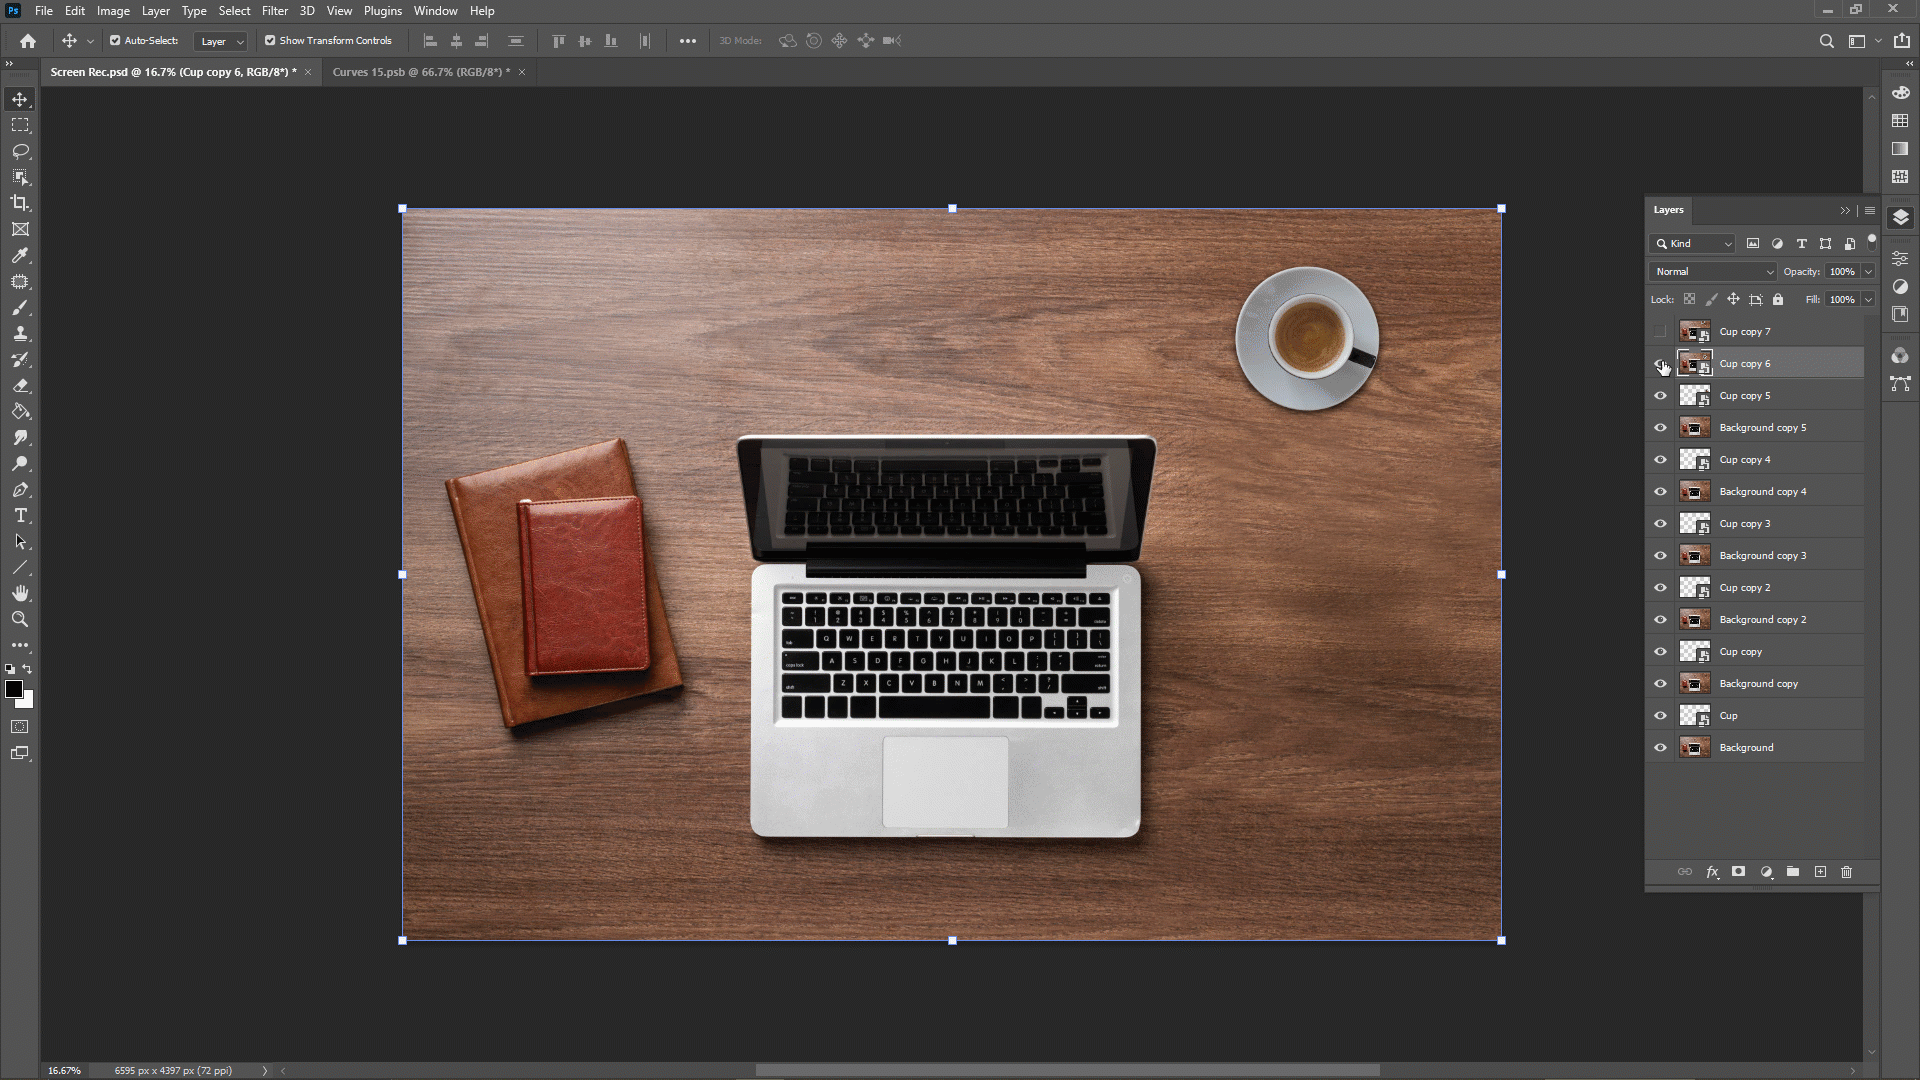
In this step, you need to make stop motion frames. For this, you need to adjust the subject position in each frame. For this, you can use a wonderful Photoshop shortcut.
You have to select the smart object and then drag it while holding the Alt key. By do that, a copy of that layer (smart object) will be taken and placed in the place you dragged. Pay attention to change the subject position to the equal distance in each frame.

In the next step, to complete the frames, you need to copy background layer as many frames as the stop motion has. Then place each background layer below each subject layer. Convert each background layer along with the subject layer above it into a smart object.
Good job, your work is done at this step.
Import Frames into the Timeline
Step 3
The first step for this part is to open the timeline panel. You can do this easily through the window menu. When you open the timeline for the first time, there is a menu in the middle of it that contains two options: “Create Frame Animation” and “Create Video Timeline”
As you can guess, you should choose the “Create Frame Animation” option. Then, in order to enter the layers as frames into the timeline panel, click on the Option icon at the top of the Timeline panel and choose the “Make Frame from Layers” option.
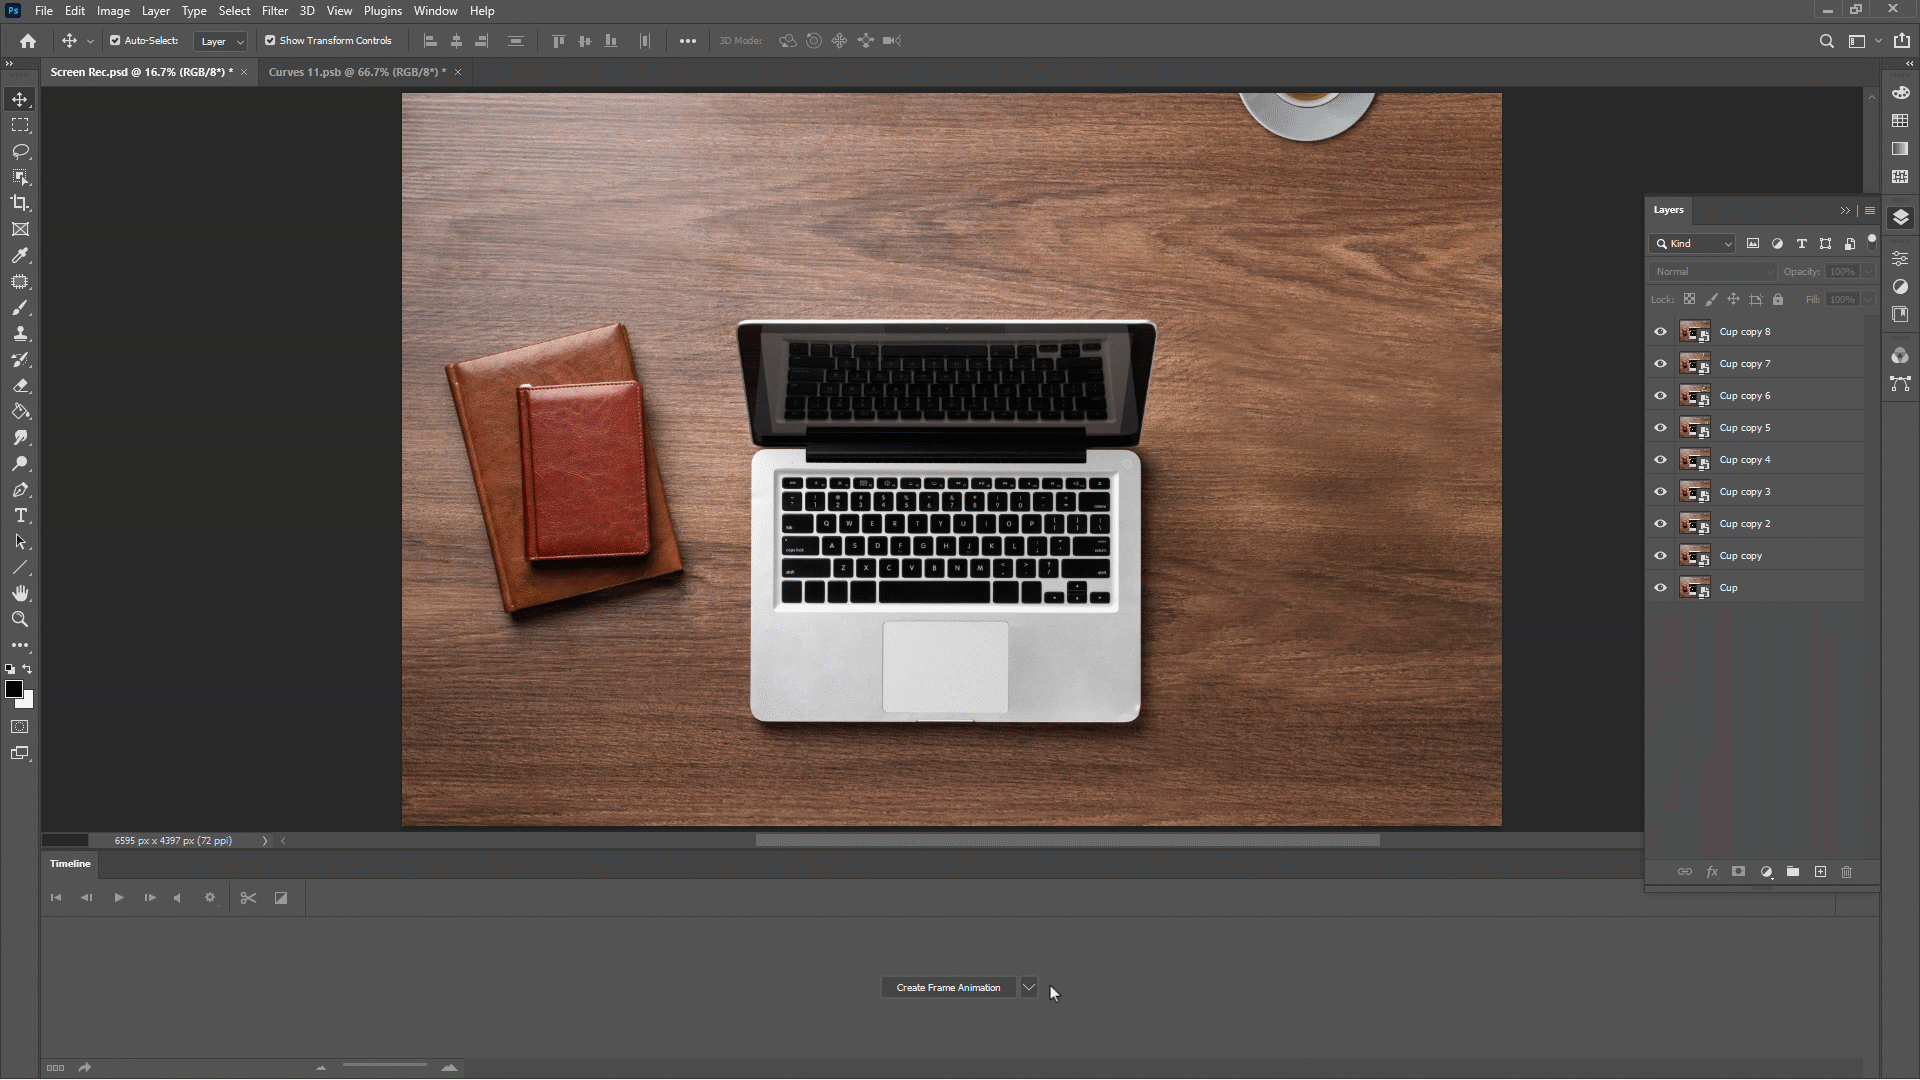
As you can see, the frames are placed next to each other in the timeline panel. Now you can see the prototype of the stop motion you made by pressing the spacebar.
In making a stop motion, timing is a very important point.
The display time of each frame is written below each frame. By clicking on it, you can change the display time of each frame. Because the display time of all the frames should be the same, select all the frames, then click on the display time of one of them and change it. Now you will see that the display time of all frames has changed.
Edit Frames
Step 4
If you want to modify a frame, just double-click on its layer in the layers panel to open its smart object, then you can change the position of the subject in it. Remember to save it after making changes.
Using Photoshop Features
Step 5
Certainly, Photoshop is one of the best software in the field of editing photo. Because you are using photos to create stop motion, you can take advantage of all the wonderful features of Photoshop.
For example, now I want to change the mood of my image a little with a Color Lookup adjustment layer.
So, click on the Option icon at the top of the Timeline panel and choose the “Convert to Video Timeline” option. Now you will see that the appearance of the timeline will change a little.
Now, if you create a Color Lookup adjustment layer in the layers panel and adjust it, you will see that Color Lookup adjustment layer has been created in the timeline panel.
Render the Stop Motion
Step 6
This is the last step of making stop motion in Photoshop. To render the stop motion you made, just click on the Option icon at the top of the Timeline panel and choose the “Render Video” option.
Now it is enough to make the desired settings in the opened window and click on the render option.
Now, you unlock the world of stop motion animation within Adobe Photoshop with our step-by-step tutorial. Learn the art of transforming still images into captivating motion as we guide you through the essential techniques.
For better learning, we suggest you to watch the tutorial video: How to Create Stop Motion in Photoshop ?
Suggested tutorials: