Timeline panel in After Effects is one of the main panels in this software. So, Knowing the tips and tricks related to Timeline can have a great impact on your efficiency. In this After Effects tutorial, you will get to know some of the most used tips and tricks of the Timeline panel.
Useful Timeline panel tips and tricks
Tip 1, Use Shy Switch
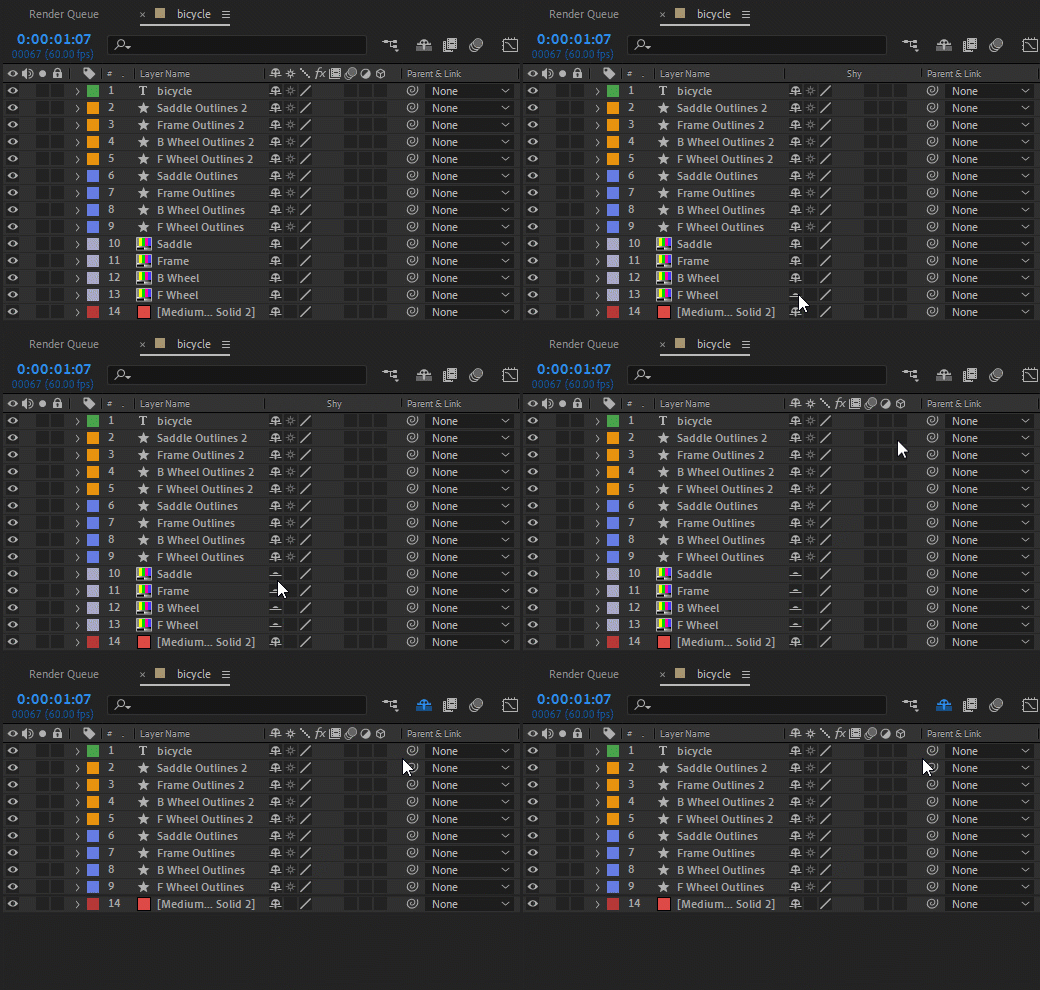
When you are working on a big project, managing layers in the Timeline panel is very important. One of the good After Effects features that prevents the Timeline from getting crowded is the Shy feature.
You can mark a layer as shy and then use the Hide Shy Layers composition switch at the top of the Timeline panel to hide all shy layers in the Timeline panel layer outline.
To toggle a layer between shy and not shy, click the Shy switch layer in front of the layer in Timeline panel. To toggle between hiding and showing all shy layers, click to select or deselect the Hide and Shy Layers composition switch at the top of the Timeline panel.
Note that: Shy layers are still render for preview and final output. It just makes the timeline panel quieter and doesn’t show the layers you don’t need them.

Tip 2, Solo Layer
You can isolate one or more layers for animating, previewing, or final output by soloing. Soloing excludes all other layers from being rendered (both for previews in the Composition panel and for final output.)
To solo one or more layers, select the layers in the Timeline panel, and click the Solo icon to the left of the layer names.
By soloing the layer, you can focus well on animating that layer, but don’t forget to un-solo the other layers when you’re done.
Shy layers are still render for preview and final output, but when you solo a layer, the other layers are not shown and process in preview or final output.
Shy layers are still render for preview and final output. but those layers don’t show in Timeline panel. when you solo a layer, the other layers are not shown and process in preview or final output. but those are visible in Timeline panel.
Tip 3, Full Screen Timeline Panel
To see any panel (included Timeline panel) full screen in After Effects hover the mouse on that panel to active that. (Show the blue border around the panel) then press tilde key “~” on your keyboard.
Sometimes when your project has many layers, displaying the timeline panel in full screen can make it easier for you.
Tip 4, Use Search Bar in Timeline Panel
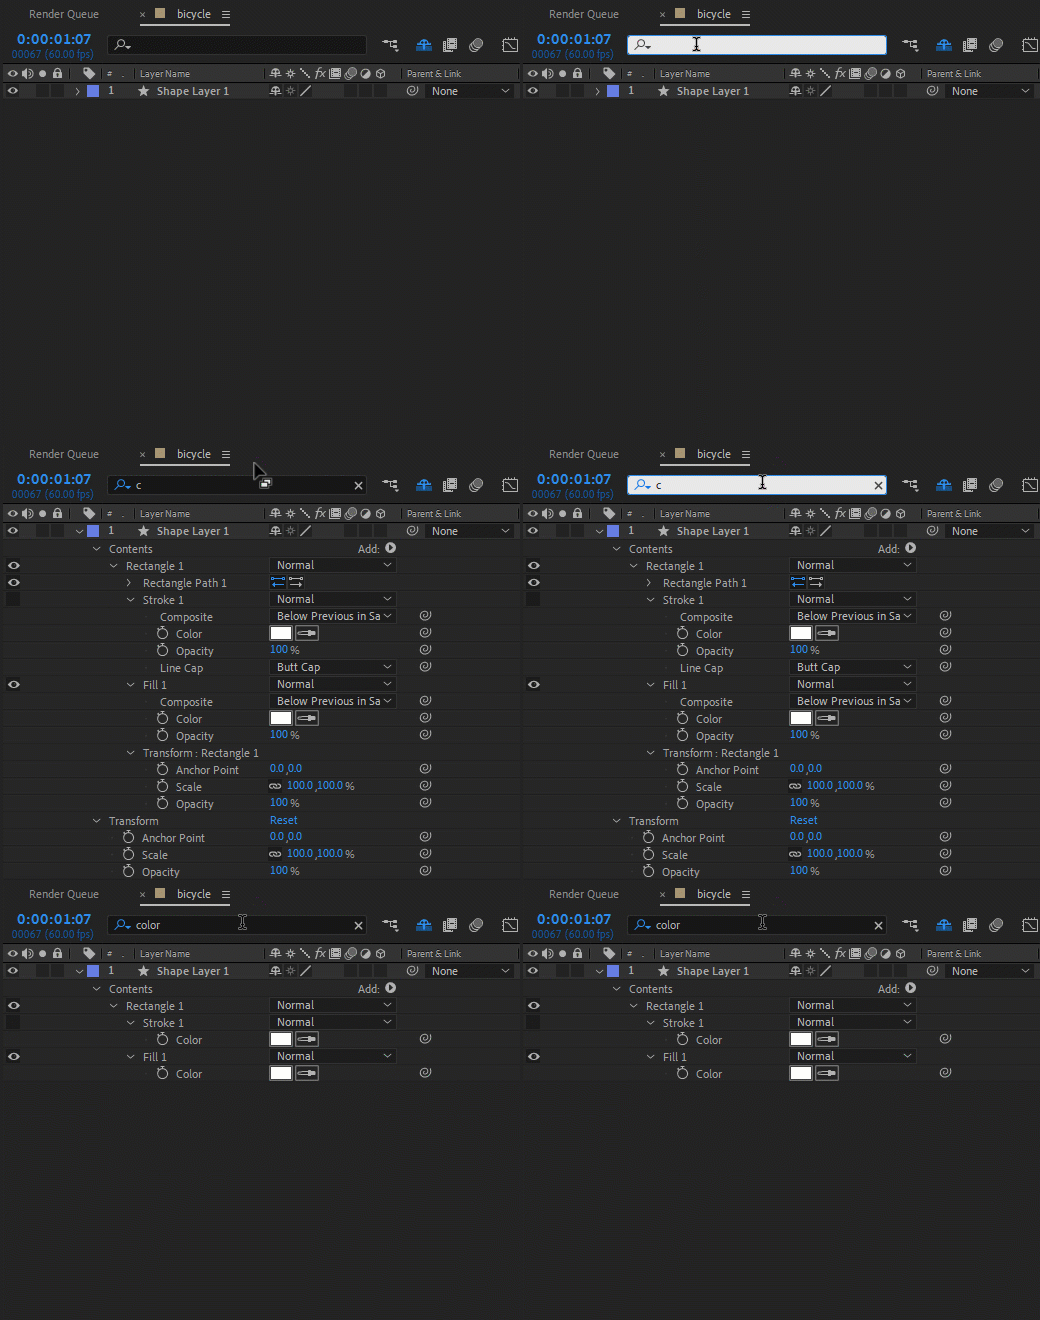
The Timeline panel contain a search bar that you can use to filter items in the panel. The Timeline panel does not the only panel that have a search bar in after effects. The Project panel, and Effects & Presets panel each contain search bar.
If one or more layers are selected in a composition, the filtering operation in the Timeline panel only affects selected layers. In this case, unselected layers are not filtered out (hidden) if they don’t match the search query. However, if no layers are selected in the composition, the filtering operation applies to all layers in the composition.

Tip 5, Use Color labels
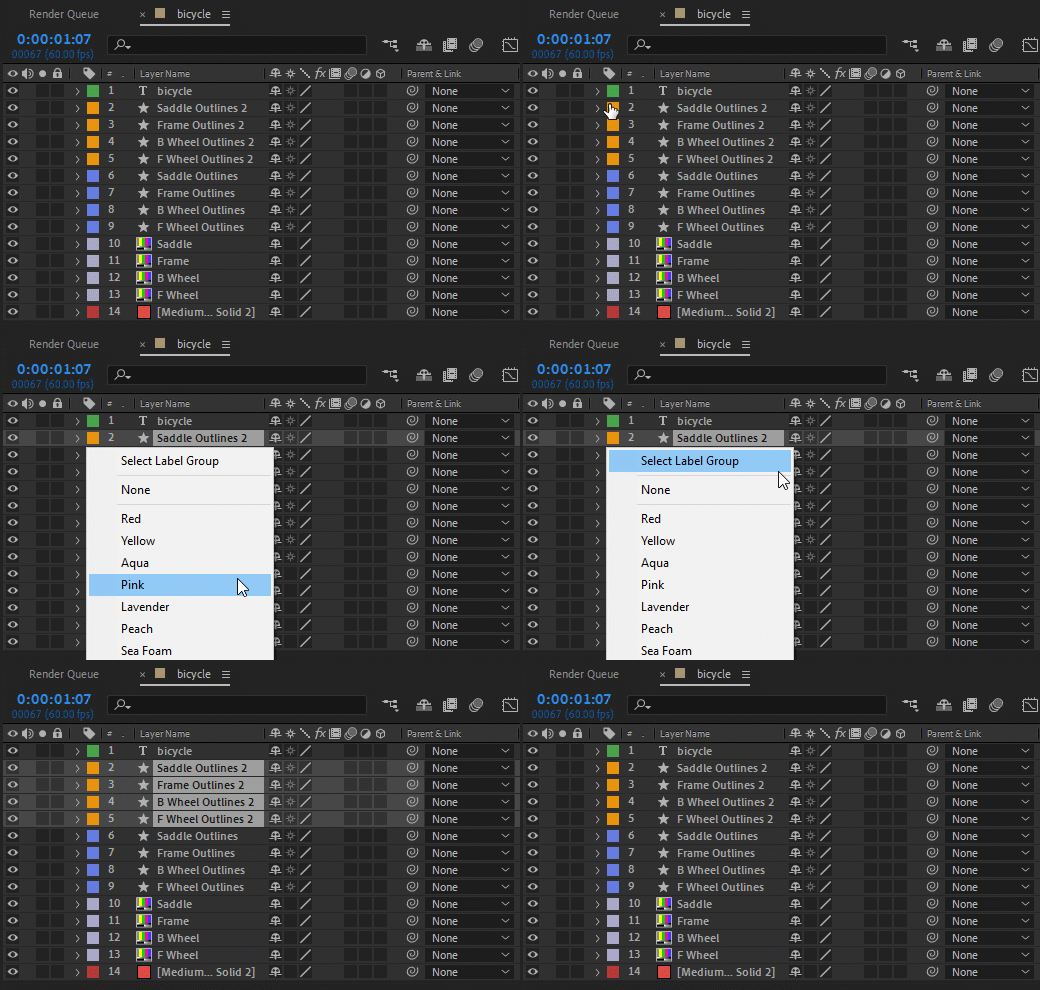
You can use labels (colored boxes in the Label column) in the Project panel and Timeline panel to organise and manage compositions, footage items, layers, and keyframes. Using labels can really increase your speed and quality.
By default, different label colors indicate different kinds of footage items (E.g., red is for solid and text layers, or blue is for shape layers, etc.) but you can assign label colors to indicate whatever categories you choose.
To change the color of a label for one layer, click the label in the Timeline panel and choose a color. To select all layers with the same label color, select a layer with that label color and right click on the label box then Select Label Group.

For better learning, we suggest you to watch the tutorial video: Timeline tips and tricks
Suggested tutorials:


